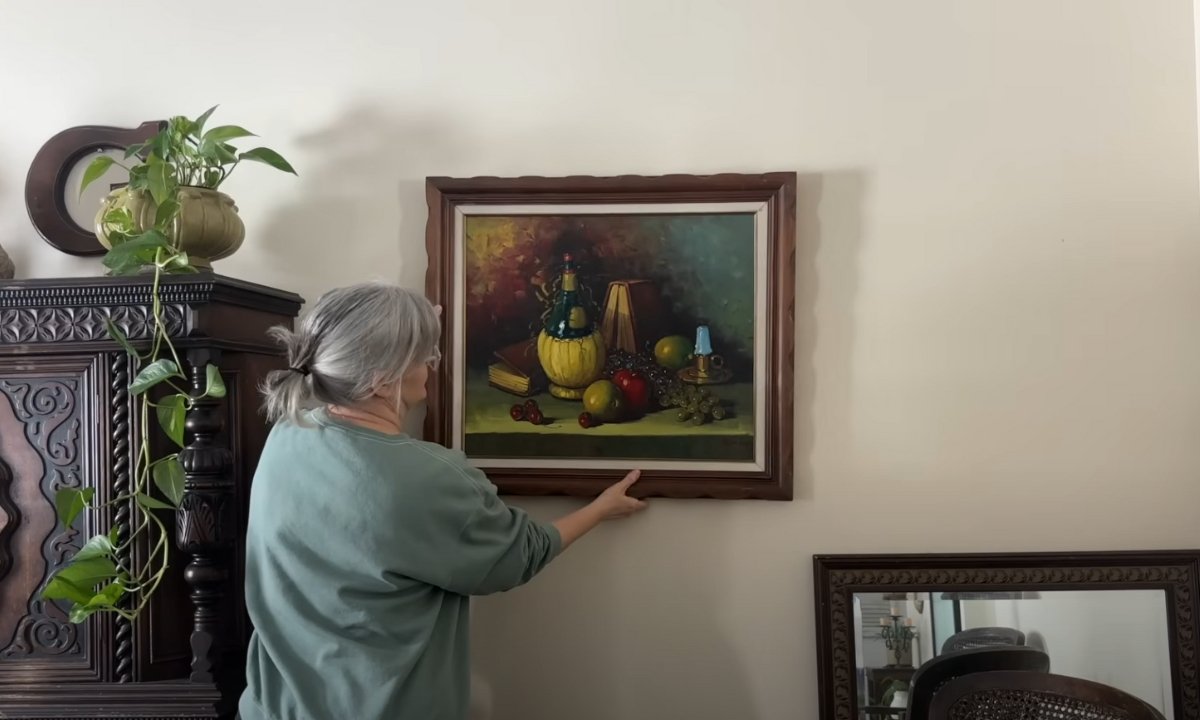
You have got the frame, you have picked the perfect wall in your home, but now you are just staring at it.
You may be thinking that I use a nail or hook? What if I mess up and leave a bunch of holes? And why does it always end up crooked no matter how careful I am?
Hanging the pictures should not be like rocket science, but most people either over complicate it or leave out the stuff that actually matters.
So, that’s why today in this article I am going to break it down with real solutions, wall-specific advice, and simple tricks that will actually work.
Let’s jump into it!
Start with the Real Problem
Let’s be honest – hanging pictures sounds easy until you actually try it. The frame may look great in your hands, but the second it is on the wall, it may be crooked.
Or even worse it falls, or lean forward. On top of that you drill once, and don’t like the placement, and now you have got a big ugly hole at your wall.

Most of the people struggle because they are unsure where exactly the picture should go, what hardware is safe for their wall, or how to keep the frame straight.
The pressure to avoid the damage makes things even trickier if you are a renter.
What You are Hanging and Where
Before you grab the hammer and hook, first take a second and think about what you are actually hanging and where.
This one step will make or break the final results.
So, if you are hanging a small print (under 11 x 14 inches), then it is usually fine with adhesive strips or a lightweight nail.
But for medium to large frames, or anything with glass, you have to check the weight first. Use a bathroom scale if you are unsure.
Because the bigger frames need stronger anchors, level support and sometimes two hooks to keep them from tilting.
Look at the room
Now you have to check the placement. Are you placing it above furniture, in a tight halfway, or on a blank wall that needs drama?
- If you are going to place it above the couch or bed then you should keep the bottom edge of the frame more than 6 inches above the furniture.
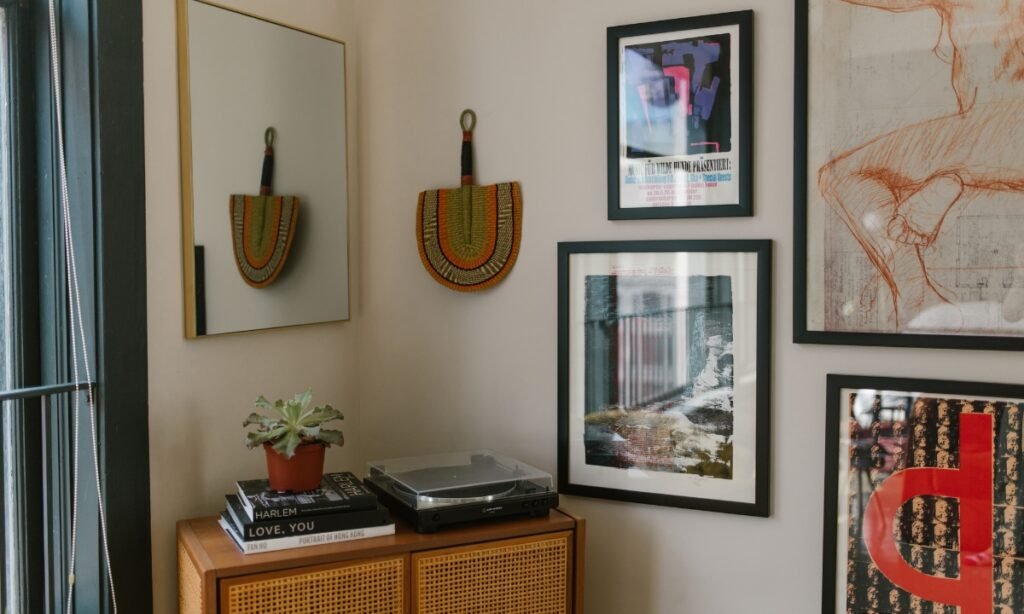
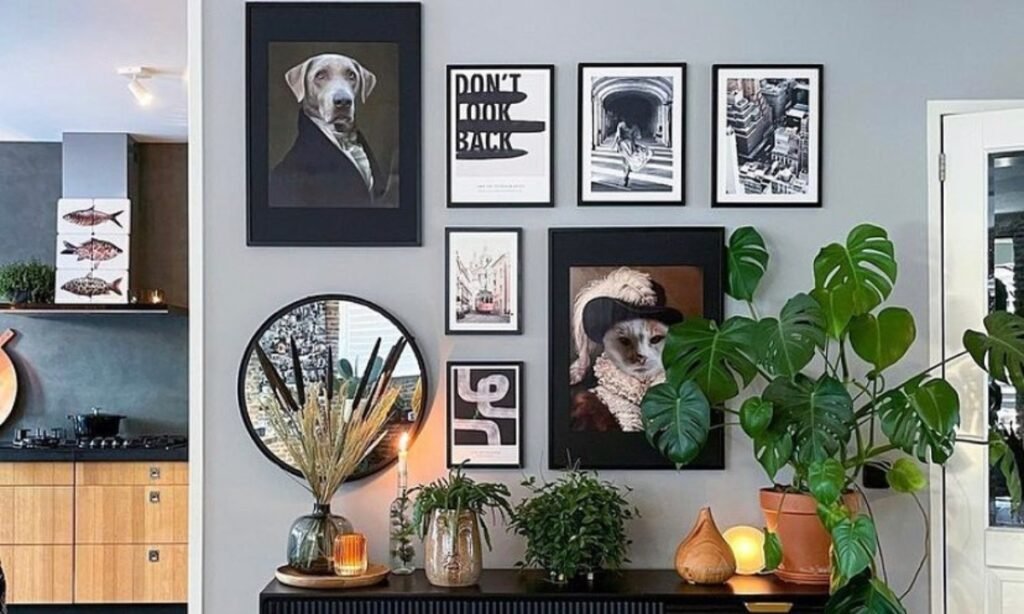
- For hallways and staircases you should use the gallery layout, and follow the slope of the stairs with consistent spacing.
- If you want to hang a picture in the entryway and solo wall then you have to center the picture at about 57-60 inches from the floor.
Try our free Wall art size calculator to find out the perfect layout according to your wall size.
The most important thing is that a tiny photo on a giant wall will look lost, and on the flip side the huge frame on a narrow wall will feel cramped.
Choose the Right Tools for Your Wall
This is where most of the people mess up things because they don’t know exactly which tool to use according to their wall type.
You can not use the drywall the same way you treat brick wall or any other type of wall. So, here is exactly which tool is perfect for different wall types.
Drywall
On a drywall for lightweight frames, you should go with adhesive strips or small picture hooks.
For anything heavier than 5-10 pounds, you can use drywall anchors or screws into a stud.
Plaster Wall
Plaster can crack easily. So, you have to drill slowly, use masonry anchors, and avoid hammer directly.
For light frames you can use adhesive strips if the surface is smooth, or maybe monkey hooks that are designed for plaster walls.
Brick or Concrete Wall
Regular nails won’t cut it here. So, you have to use masonry screws or brick clips if you don’t want to drill.
For a permanent hold, you can use a masonry bit and wall plugs.
Tile Wall
You have to treat the tile like glass, and should use the suction hooks or adhesive options for light frames.
For heavy frames you will need a diamond drill bit and be patient to avoid any crack to tile.
For Renters
If you are a renter then you should stick with adhesive strips, Velcro hangers, or removable hooks rated for your frames weight.
Look for the kind that peel off cleanly most are labeled “damage-free”. It is better to be safe than lose a security deposit.
The Foolproof Hanging Method
Now you have decided everything and you just need a repeatable method that works every single time.
Whether you are hanging one picture of a full gallery wall, this five step process will keep things straight, centered, and stress free.
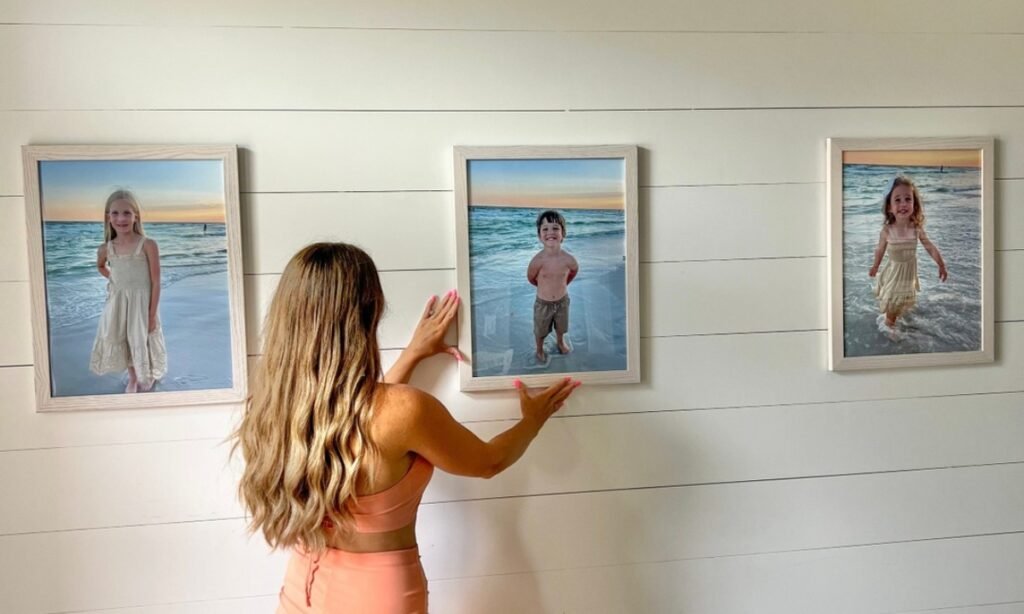
Step 1: Trace the frame on paper
Use a kraft paper, wrapping paper, or even a newspaper. Now cut out a shape the exact size of your frame. Do this for every picture you are planning to hang.
Step 2: Tape the paper to the wall
Now use the painter’s tape to stick your paper cutouts to the wall. Move them around until it feels balanced.
Step 3: Mark hardware spot
Flip your actual frame over and measure how far the hook or wire from the top edge.
Now mark that exact spot on the paper cutout that is still taped to the wall.
Step 4: Install the hardware
Now you have to install the hardware according to your wall type as we already discussed above.
If you are using adhesive strips then you must follow the package instructions.
Step 5: Hang and level
Now remove the paper. Hang the picture and then step back and use a level or even a phone app to make sure it’s straight.
If it shifts or lean forward, add museum putty or rubber bumpers behind the bottom corner to keep it in place.
Here’s the perfect video explanation for this whole process. Check video on Instagram
Common Mistakes (and quick fixes)
As we already discussed, hanging pictures just seems simple but in reality it is a bit complicated task.
Here are few mistakes people do:
Picture keeps leaning forward
This often happens when the hanging wire is too loose or the hook sits too far off the wall. To fix this issue use two hooks instead of one or swap to D-rings.
Picture is too high or too low
The eyeballing picture is the most common mistake and it ends up with a picture that feels disconnected from the rest of space.
If you are hanging a solo picture then you should center it at 57-60 inches from the floor.
If it is above the furniture then the distance between the picture frame and furniture should be 6-8 inches.
It’s crooked even after leveling
If you are using hanging wire and only one hook then the frame can shift over the time.
The quick fix is you should add a second hook or stick a small piece of museum putty to the bottom corner.
Too many holes
If you already messed up the wall with too many holes then you should try a dab of toothpaste or spackle. Let it dry sand lightly and paint over it.
Conclusion
Hanging a picture on a wall is not just about putting nails into drywall, it is about getting the right look without the stress, damage or guesswork.
You must be aware of the right tools for your wall type. The foolproof method is perfect to hang the pictures on the wall without any damage or stress.